Showing posts with label boys. Show all posts

Tuesday, 28 April 2015

Football!

So for the last week or so I've been working on a canvas for a friends lads bedroom. It's not something I've ever done before but I've really enjoyed...


As you can tell it's the Liverpool emblem, hand sketched and then painted onto the canvas...


Taking shape...


Was dreading this bit...


Just about there. Took a couple of coats but was really pleased with the results! 


Finished! 

Fay x

Wednesday, 15 January 2014

finally getting over the festive period!

I can't believe it's 2014, and how little time I've had. Is it just me or does no-one else get the chance to sit down till about 9pm (even on days off) to finally get to do their 'hobby'?  I just don't where the hours go in the day...

So finally I can share some of my Christmas Orders, I hope you like.


I love this particular quote (and style of canvas).  It's a large canvas 50cm x 100cm and used to take me forever to paint as each letter is painted individually, before painting the canvas and then gluing each letter to the canvas.  Until I discovered Annie Sloan chalk paints this used to take about 7 coats, whereas now I'm looking at 2-3 with a much nicer finish as well!  It also means that time wise, it's a lot quicker and best of all cost wise, it's a lot more reasonable.

Next was another white collection canvas, a completely personalised quote to the customer which I thought was just fantastic.

I really enjoyed doing this, might not be to everyone's taste, but certainly made me chuckle!


Now for the original reason I bought the Annie Sloan paints - which I got from the fabulous The Vintage Corner in Pocklington, York - distressed canvases...


Again a large canvas 12" x 32", perfect for above a headboard! Was really pleased with how this turned out...


Having seen how well this worked I had two letter canvases to do and my lovely customer kindly let me use my artistic discretion and go with the same style.


Thank you to all my lovely customers, without whom this wouldn't be possible and I enjoy so much so long may it continue!

Would love to hear your thoughts and please follow my blog and facebook page to see some exciting projects I will be undertaking at home this year, along with my lovely customer orders.  

Here wishing everyone a fab 2014!

Fay x


Monday, 9 September 2013

How Great Britain is!

Finally I've managed to finish middle sons Freddie's canvas!  It's taken me that long that I can't actually remember when I started it! Anywhere he we go hope you like...

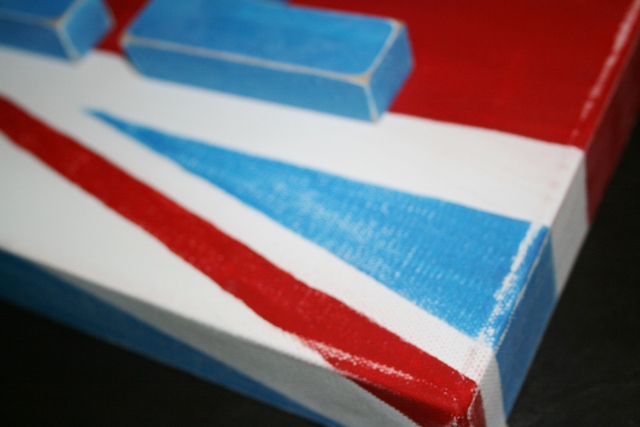
Ever since the Olympics, Fred has been obsessed with Great Britain and especially the Union Jack, so after buying everything and anything with a Union Jack on for his bedroom, he asked if I'd do him his canvas the same...


Once marked out, it was time to start painting...

 
Fred chose the paints, so we had pillar box red, antique white and a metallic blue...


Couple of coats of each, the wooden letters also painted in the blue.  Then time to distress with sandpaper, I used several grades to give a more natural worn feel, using higher grade on corners and edges and a finer grade on the front and sides of the canvas


Finally attached all the letters to the canvas (after much discussion as to whether they should be straight, squint, skewhiff LOL) and voila!


Hope you like?! I think it'd also work really well with a decoupage Cath Kidston floral type theme, or some pastel patterns, vintage style.  Anyway on to the next one now, Samuel. He's coming up for two and has blue/white room in Peter Rabbit Fabric so will try to include the fabric in the canvas somehow... 


Friday, 29 March 2013

time for her baby...

So I've  been busy making some bits for my babies room.  I had already made the bedding with the fab Peter Rabbit material for his cot and so decided to add a few bits to his room...


I got a pattern for a door stop (original link/pattern no longer available but think this one is better! Though wouldn't bother interlining unless really thin material) which i'd made for a couple of family members, and it's so easy and cute I thought i'd use for baby Samuel's room.  Seriously it's so easy and you end up with this!

I then got a little giddy and went 'off-pattern' to create some tie-backs...  

Needed: Spare material
4 x D Rings
Thread

Cut 2 lengths (whatever you have hanging around, approx 20" x 4") of fabric and 4 small tabs (approx 3" x 1").  Fold the two lengths in half  - good sides in - and sew down one length (leaving 0.5" un-sewn at each end) then turn right side out and press.


At the same time press the smallest hem on each side of the long length of your 'tabs', these are used to attached your D-rings.  Sew down each hem, no need to back stitch as these will be en-cased in the actual tie-back.  It's just for a good finish...


Fold these tabs over the D-Rings (I had some from old tie-backs I no longer used) and sew across to fix in place.  Don't worry if not very neat as will all be covered up shortly!


Fold in the ends of the tie back lengths (you can do this when pressing and press these for neatness, but no biggy), and then slot in the 'tabs' and pin in place...


Sew round the full length approx 5mm in from the edge, start half way down a length as will be covered when folded.  The edging not only gives a professional finish but attaches the 'tabs' to the actual tie backs. 


Once sewn you are left with these fab tie backs! 


Hope my instructions were okay, thought i'm aware some pics initially would have been good!  Any questions just ask!

Fay x


P.S Up-cycling at it's best, all made from off-cuts x


Wednesday, 27 February 2013

some time and some motivation!

So it's been a while since I managed to update my blog and today I decided that I just had to craft as it's about the only thing keeping me sane at the moment!  I had a little of the Peter Rabbit Toile style fabric left which I'd got from The Remnant House in Harrogate and as I was unsure if I would be able to get more I decide to use the last to make a pillow case and duvet cover for my sons cot bed.


I had a baby blue fitted single sheet in my 'spare' bedding and as I doubt my two eldest boys will ever require baby blue, and baby Samuel will be in his cot bed till he's old enough to have grown out of baby blue, I thought I'd put to better use and use as the backing for the cover and case!


I cut out using old bedding as a template, then pinned and sewed the pillowcase first, followed by the duvet cover.


While I will use button fastening for future sets, I did use sew on velcro this time as I had no suitable buttons available and was too impatient to finish! LOL.


I do like to cut off the corners so you don't get the 'bulk' once they've turned the right way.


A quick iron and I think you'll agree they look lovely! Can't wait to make some more...


Thanks for reading and hope you enjoyed!

Fay x

P.S My blog is and always will be about my crafting, and while I don't want to get personal I do want to make you aware that I am going through some difficult times at the moment personally and at my 'day job' please stick with me as I love to do what I do and I will get through this.  I hope that my crafting inspires you as that would make me very, very happy!


Wednesday, 23 January 2013

a few extra hours in the day...

Okay so quite an exciting couple of weeks, although it's taken till now to get updating as there just aren't enough hours in the day.  I'm sure you know how it goes, the 'day' job is manic, the 'parent' job is manic and trying to fit in a little bit of crafting just seems so hard!  Made all that harder last weekend by 3 birthdays and a wedding anniversary, so it's all been a bit... manic! LOL :-) 

Anyway I've finally managed to get enough done to warrant updating the blog for you all to see what's going on.  As you know while I've been waiting on the letters to arrive for the TinTin canvas for my eldest, I've been keeping myself busy with some possible new additions to the Nursery Collection for 2013.

So the personalised building blocks are now finished! #woohoo.  I started off by painting the cubes themselves with three shades; grey, antique white and frosted mint as below:


Then I hit a little stumbling block (pardon the pun!) and couldn't decide whether to paint the letters all the same colour or different, I put it to my fab followers on Facebook and Twitter and out of many suggestions I liked the suggestion of different shades of the same (Thank you Jos, Helena and Angie!) so the next step was to paint the letters and place them on the cubes, think you'll agree the result is rather nice!


Will post a picture of the blocks in natural daylight on Friday so the colours can be fully appreciated.  They'll be available in grey, white and your choice of Mint, Lilac, Pink or Blue.  They can come with a simple a,b,c or could be completely personalised with a child's name.  I really think they'd look stunning in a Nursery, hope you agree?  Got to work on the boring bit now, costings...

Anyway will leave you with a few teasers of the TinTin canvas which I started today...


Hope to update you soon,

Fay x


Saturday, 12 January 2013

New paints to use!

So I've ordered my 'letters' for Henry's canvas from the lovely David at Infinite Store who produces lots of different crafting goodies including wooden letters and names, so while I'm waiting on them to arrive I received a delivery of some possible new additions to the Nursery Collection from Craft Shapes including the building blocks, and I can't help but want to get crafting...


I found these amazing acrylic 'pearlised' paints from docrafts and as well as being the perfect colours they just looked so beautiful I knew I had to use them.


I'll paint the cubes and then decorate with 6mm thick wooden letters (again from Infinite Store) personalised to the customers requirements.


Anyway, I've started painting so watch this space for the results...

Fay x


Saturday, 5 January 2013

New inspiration!

So it's 2013 and I promised that I'd start blogging about what I do and how I come up with ideas etc.  For those who don't already know Felicity is me! It's the name my parents couldn't agree on calling me, so Fay I became (fits perfectly!), but Felicity worked perfectly with my eldest two Henry & Freddie! So Henry, Fred and Felicity was born...


Last year was great and a real eye opener to what works and what doesn't for online sales, craft fairs etc.  I'm not saying I've got it right yet, but I certainly know a heck of a lot more than I did 12 months ago!


Anyway, this year I'm looking to expand in a couple of areas:


Canvases

I'll be looking at smaller versions of the name and phrase canvases as they are quite large (approx 40"wide) and also where customers want 2 or more (I have one at the moment who requires 5 in the spring!) I'm conscious that we're talking a lot of money at original size.  I'll also finally be making my boys their canvases I've been promising since we moved! 

Nursery Collection

I'm looking to add to the hand-knitted and sewn nursery collection with a range of hand-painted gifts.  I will be experimenting with toys, memory boxes and peg people over the next few weeks and will be keeping you posted with how I get along, so would love to hear your thoughts along the way!


Anyway time to go make tea, then looking for more inspiration tonight! 1st Job on the list is a Tin Tin name canvas for my eldest Henry (7).


Health and best wishes for 2013,


Fay x