Monday, 11 November 2013

Annie Sloan paints!

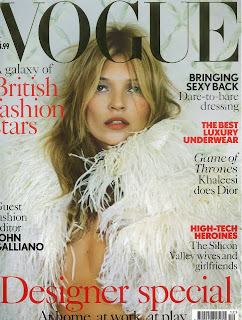
So after the excitement that was Dec Issue Vogue I am now working hard on new orders received and some exciting ideas for Christmas Fayres.  The 'feature' wasn't quite as I expected, more of a listing but I can't complain at the effect it's had!


First of all is a little gift for a friend.  She'd seen the quote somewhere and asked me to reproduce in my own style, and I now have more orders on the back of it!  I can't believe it's taken me so long to find these paints. Annie Sloan is a genius, these paints are amazing and I am a complete convert...


I bought them from The Vintage Corner, locally in Pocklington and will be visiting again very shortly for more supplies now the orders are coming in daily.


Plain canvas, painted firstly with Henrietta...


Then coat of Old White...


After a sanding down to reveal the undercoat it was time to get writing.


Funny I know!
Still thought it was missing something, so added little heart.


The finished canvas, with a little 'Home Sweet Home' ribbon to hang by...


Fun to do, hope you like.

Fay x 

Wednesday, 18 September 2013

Working with Vogue

So I still haven't managed to start little Samuel's canvas, bless him.  Lucky he's young enough not to care/notice! LOL.  However in the meantime something quite exciting has happened...

Vogue have approached little old me to work with them, now I am not going to pull the wool over anyone's eyes and make it more than it is, it is an advertorial, but the mere fact that they approached me is enough to make me smile!


It actually took a while for it to sink in, much time scouring the internet, linkedin etc. to check that it was real and not a hoax (who's that bothered...) but there's so much self doubt that I just couldn't help myself. Anyway the artwork and 'blurb' has been sent, it's just a waiting game now...


I asked them how they found me and it was through Stork Up, who I have to say I have neglected badly over the last few months, so am in the process of updating everything. So ladies it's a big, big, mahoosive thanks from me :-)

As you may have guessed it'll be featuring my hand-painted art nouveau / art deco style canvases which are just perfect for your little one, or for a truly unique gift this Christmas! However having finally sorted out my laptop / broadband issue I have managed to update the website to show all canvases that I offer. 


I really hope you like what I've done with the website now that I'm concentrating on the bespoke canvases, but please let me know if there is anything you'd like to see or you think I've missed.  Here's hoping I get the chance to get on with Samuel's canvas soon before Christmas orders start coming in... 

Lots of love and very excited whoops!

Fay x

P.S haven't even mentioned Ginja Ninja who is trying to re-type this blog as we speak...


Monday, 9 September 2013

How Great Britain is!

Finally I've managed to finish middle sons Freddie's canvas!  It's taken me that long that I can't actually remember when I started it! Anywhere he we go hope you like...

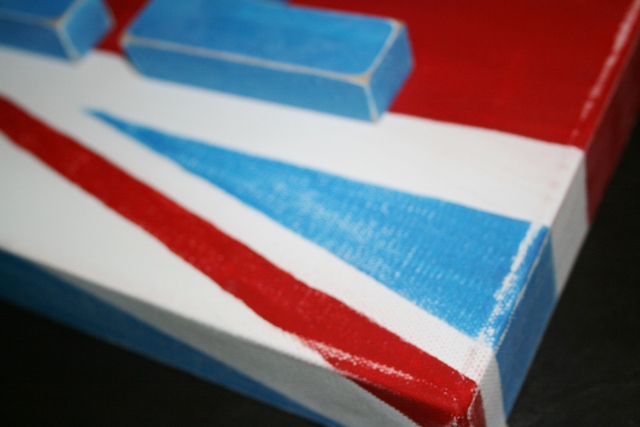
Ever since the Olympics, Fred has been obsessed with Great Britain and especially the Union Jack, so after buying everything and anything with a Union Jack on for his bedroom, he asked if I'd do him his canvas the same...


Once marked out, it was time to start painting...

 
Fred chose the paints, so we had pillar box red, antique white and a metallic blue...


Couple of coats of each, the wooden letters also painted in the blue.  Then time to distress with sandpaper, I used several grades to give a more natural worn feel, using higher grade on corners and edges and a finer grade on the front and sides of the canvas


Finally attached all the letters to the canvas (after much discussion as to whether they should be straight, squint, skewhiff LOL) and voila!


Hope you like?! I think it'd also work really well with a decoupage Cath Kidston floral type theme, or some pastel patterns, vintage style.  Anyway on to the next one now, Samuel. He's coming up for two and has blue/white room in Peter Rabbit Fabric so will try to include the fabric in the canvas somehow... 


Monday, 19 August 2013

An ounce of sanity in the school holidays!

So not only has it been the school holidays, but my tablet froze on me twice and my laptop had glass of wine spilt on it, so I've been practically cut off especially in terms of images which were all on the laptop!  Anyway it hasn't stopped me creating and wanted to see what you thought of my new hand painted canvases...


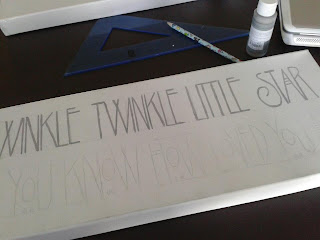
Painted in grey, the canvases can then be personalised with child's name and special dates in whatever colour choice you require.  


You can choose from two quotes, 'Twinkle Twinkle' as shown or
'The only thing worth stealing is a kiss from a sleeping child'


Simple but beautiful, I hope you agree! Fay x
 
P.S just realised I never finished/posted blog about Fred's Union Jack Canvas, so will update and post in next day or so LOL.
 

Wednesday, 1 May 2013

life is tough, but there's always time to craft!

It's been too long, so for that I apologise.  But finally updating you on what I've been up to, the boys (all 3) have had Chicken Pox which in the end from start to finish lasted just under 5 weeks! Poor Fred only went back to school today...

I have been able to get a few bits and bobs done though as helps me relax on an evening. Got some fab stickers from Royal & Langnickel which you can get over here, but typically the ones I wanted were only available from U.S (don't ask about the shipping! LOL).


Used these to mark up some bottles I had in the kitchen for oil.  Purely for my own pleasure, but very pleased with the results...


I'm waiting on couple of spare crates from father in law, that I will paint and then use these stickers to decorate - one to watch for...


Then I used these stunning beach stickers to decorate a box I had got ages ago but never ended up using, is now perfect for my attic bathroom and it's beach theme.


Lastly I decided to hand paint a couple of canvases as have a fair on Saturday in our Village and as well as my usual stock I wanted to try my hand at Rennie Mackintosh font I used to paint all the time when I did art at school. So had a go and will take to fair to see what people think...


Let me know what you think!

Signing off for now.  Loads more to do, so should update again soon.  Fred's Union Jack canvas to finish, curtains to make to match Samuel's tiebacks and I've ordered baby shoe pattern to make some shoes for Samuel too :-)

With love,

Fay x

Friday, 29 March 2013

time for her baby...

So I've  been busy making some bits for my babies room.  I had already made the bedding with the fab Peter Rabbit material for his cot and so decided to add a few bits to his room...


I got a pattern for a door stop (original link/pattern no longer available but think this one is better! Though wouldn't bother interlining unless really thin material) which i'd made for a couple of family members, and it's so easy and cute I thought i'd use for baby Samuel's room.  Seriously it's so easy and you end up with this!

I then got a little giddy and went 'off-pattern' to create some tie-backs...  

Needed: Spare material
4 x D Rings
Thread

Cut 2 lengths (whatever you have hanging around, approx 20" x 4") of fabric and 4 small tabs (approx 3" x 1").  Fold the two lengths in half  - good sides in - and sew down one length (leaving 0.5" un-sewn at each end) then turn right side out and press.


At the same time press the smallest hem on each side of the long length of your 'tabs', these are used to attached your D-rings.  Sew down each hem, no need to back stitch as these will be en-cased in the actual tie-back.  It's just for a good finish...


Fold these tabs over the D-Rings (I had some from old tie-backs I no longer used) and sew across to fix in place.  Don't worry if not very neat as will all be covered up shortly!


Fold in the ends of the tie back lengths (you can do this when pressing and press these for neatness, but no biggy), and then slot in the 'tabs' and pin in place...


Sew round the full length approx 5mm in from the edge, start half way down a length as will be covered when folded.  The edging not only gives a professional finish but attaches the 'tabs' to the actual tie backs. 


Once sewn you are left with these fab tie backs! 


Hope my instructions were okay, thought i'm aware some pics initially would have been good!  Any questions just ask!

Fay x


P.S Up-cycling at it's best, all made from off-cuts x

Saturday, 23 March 2013

some time to take a break and bake!

So it's been all work and no play recently.  My day job is pretty full on and stressful at moment (not really what I envisaged when I applied for a little part time job in an office for some extra pennies! LOL) and things at home always manic, with 3 boys so no let up there.  However last weekend I decided it was time to take a break, put everything aside and spend some time with my eldest, baking bread!

 Yes we cheated, it was only pre-bought packet mix.  In our defence OH had bought it ages back as he 'said' he'd make in bread machine but never did, so it needed using!
 Mixing done we kneaded, although H had to take over as i managed to crack knuckles while kneading and ended up with swollen hand for the week - who'd have thought baking was so dangerous!


 Having been unsure on the size of the loaf tin we hedged our bets and halved the mixture, making small loaf and four bread buns/rolls.  Covered and put in airing cupboard to prove...


We quickly realised that the tin was in fact 2lb and we could have put whole mixture in, ah well now we know!


Then into the oven for 20-25 mins to bake.  Checking when we removed them they were cooked properly by tapping on their base for hollow sound.  Perfect!


We were very happy with the result!  Might need to have a go at it from scratch next time.  Will try not to break my hand in the process!!!!

Anyway, back to work now :-(

Fay x